Everything About Steak You Wish Someone Had Explained to You Before
This article contains affiliate links. If you make a purchase through these links, we may earn a small commission at no extra cost to you. We only recommend products we love and believe in. Thank you for supporting Ignite & Simmer
Let’s face it: cooking a perfect steak at home can feel like cracking a secret code. You scroll through countless recipes, try fancy techniques, and sometimes still end up with a tough, flavorless disappointment. But what if I told you that mastering steak isn’t about luck or complicated methods? It’s about understanding a few key principles and applying them with confidence. This guide is your steak decoder ring – everything you wish someone had explained to you before, all in one place.
Choosing the Right Steak: The Foundation of Flavor
The journey to steak perfection starts long before you fire up the pan. Selecting the right cut is paramount, so let’s demystify your options:
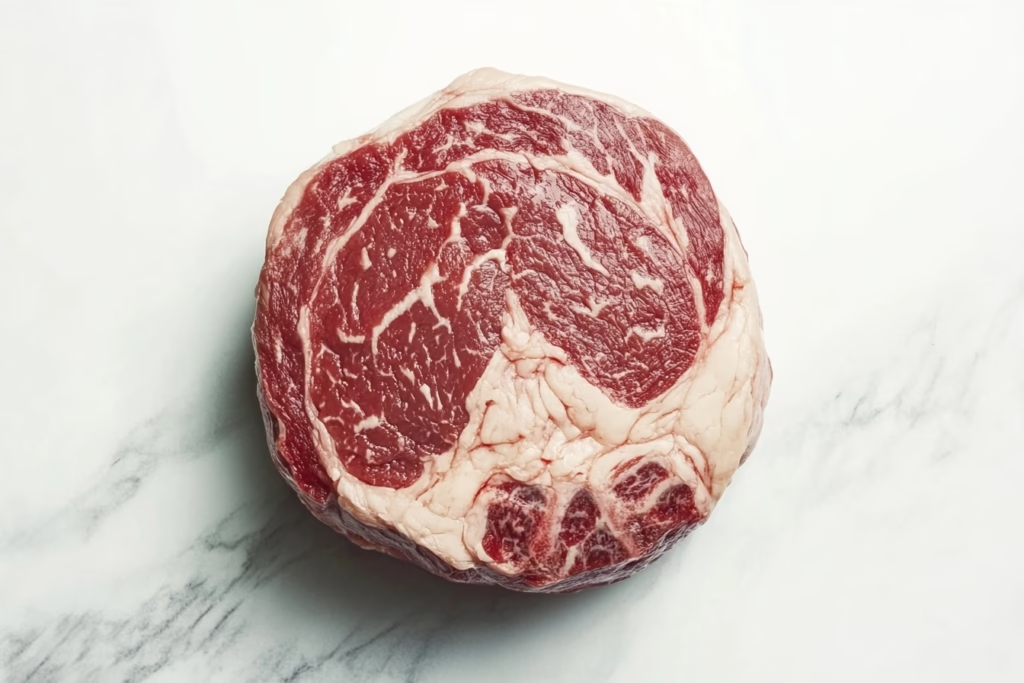
- Ribeye: The King of Flavor. Known for its rich marbling, the ribeye is a true flavor bomb. The fat renders beautifully during cooking, creating a juicy, incredibly beefy experience. It’s generally less tender than a filet, but the flavor more than makes up for it. Expect to pay a bit more for this premium cut.
- New York Strip (Strip Steak): The Balanced Choice. This cut offers a fantastic compromise between tenderness and flavor. It has less marbling than a ribeye but still boasts a good beefy taste. Its firm texture makes it a great option for pan-searing or grilling. The New York Strip is my personal go-to for weeknight steak dinners.
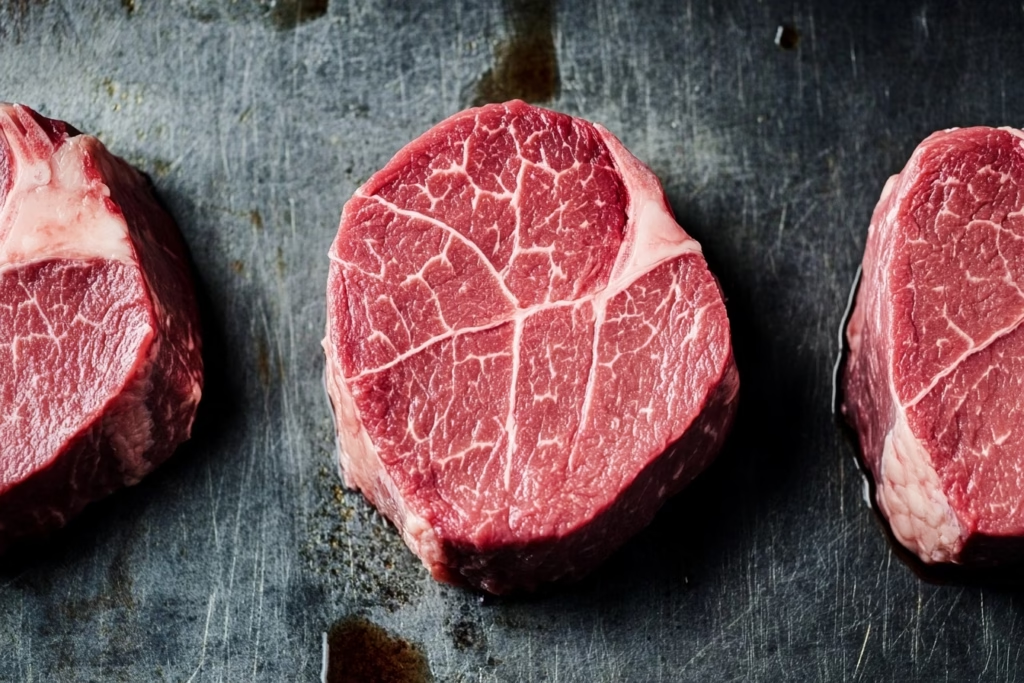
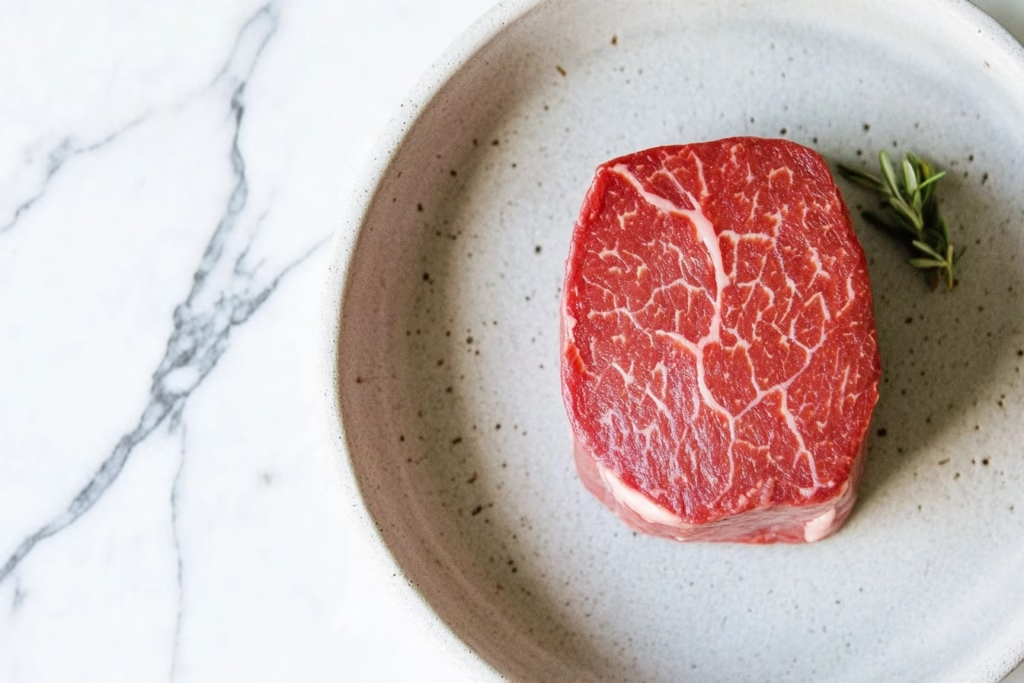
- Filet Mignon (Tenderloin): The Melt-in-Your-Mouth Marvel. The filet is prized for its exceptional tenderness. It comes from a muscle that does very little work, resulting in a buttery-soft texture. However, it’s the leanest of these cuts, meaning it has the least amount of fat and, therefore, less inherent flavor. It’s often paired with rich sauces to compensate.
- Sirloin: A Budget-Friendly Option. Sirloin is a leaner, more affordable cut. While it may not have the same melt-in-your-mouth quality as the others, it can still be delicious with proper preparation and careful cooking.
Decoding Grades: What Are You Really Buying?
You’ve likely seen “Prime,” “Choice,” and “Select” labels on your steak. Here’s what they mean, according to the USDA:
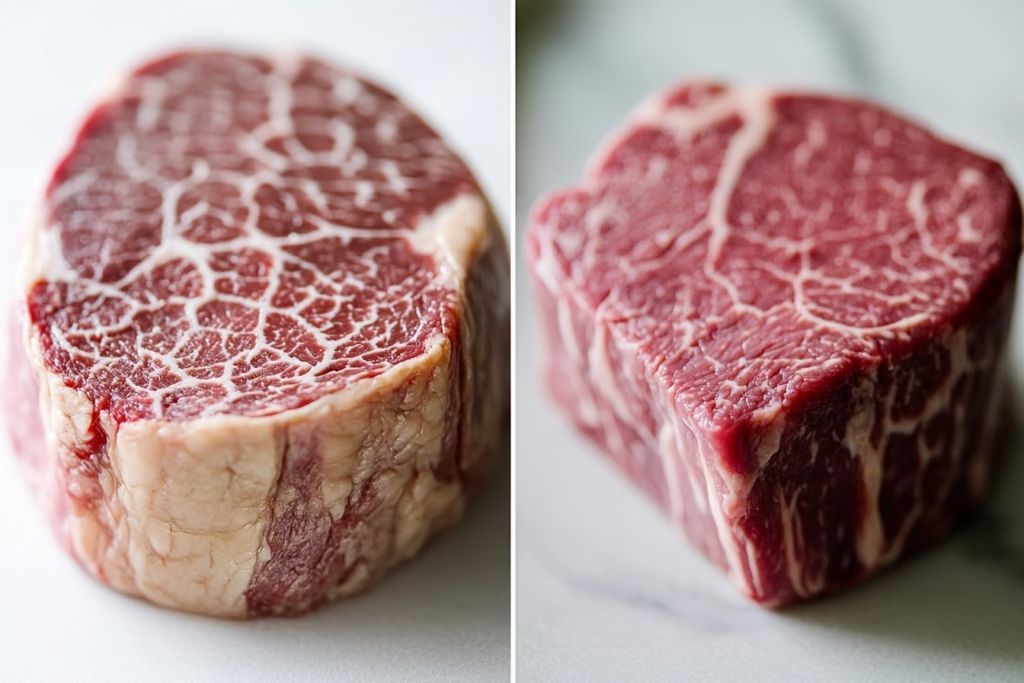
- Prime: The highest grade, representing the most abundant marbling. These steaks are exceptionally tender and flavorful. Often found in high-end restaurants and butcher shops.
- Choice: High quality, with good marbling. A solid option that offers a good balance of price and quality.
- Select: The leanest of the three grades, with less marbling. These steaks can be a bit tougher and less flavorful, so proper cooking is crucial.
Don’t be afraid to ask your butcher about the grading of the steaks in the case. They can offer valuable insights!
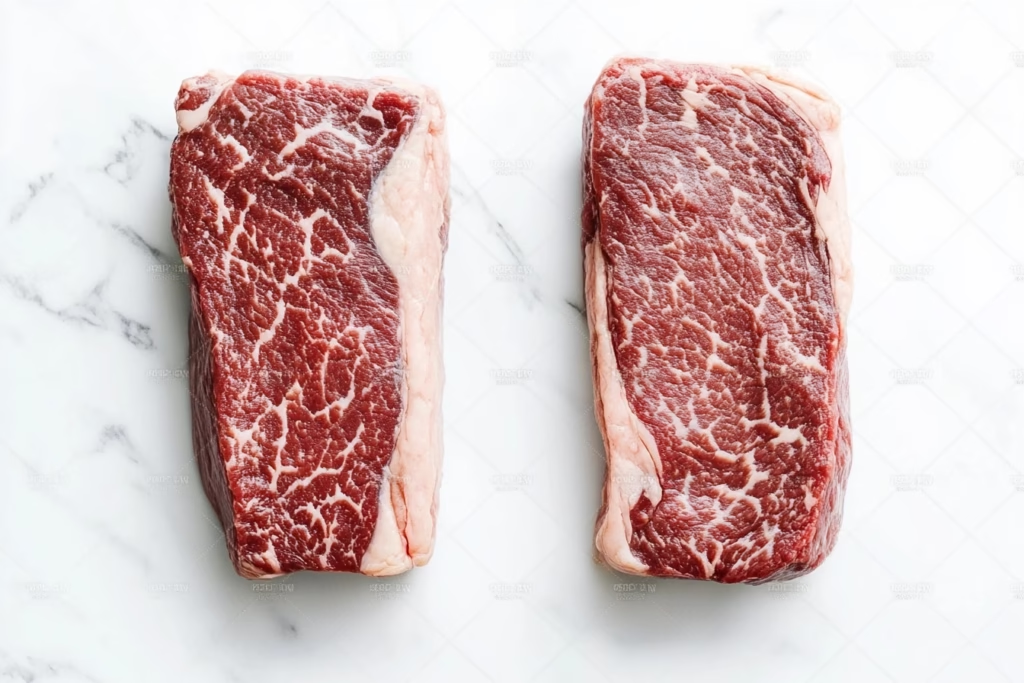
The Importance of Marbling: It’s All About the Fat!
Speaking of marbling, it’s the single most important visual cue for predicting a steak’s flavor and tenderness. Marbling refers to the intramuscular fat – the white flecks and streaks that run through the muscle.
- Why It Matters: As the steak cooks, this fat melts, basting the meat from within. This results in a juicier, more flavorful steak. Think of it as tiny flavor bombs exploding as the steak cooks!
When choosing a steak, look for generous marbling evenly distributed throughout the cut. Steaks with minimal marbling will tend to be drier and tougher.
The Science of Salting: More Than Just Flavor
Salt is your secret weapon for elevating steak. But it’s not just about adding a salty taste. It’s about enhancing the natural flavors and improving the texture.
- Why Salt Matters: Salt draws moisture from the surface of the steak, which then dissolves the salt. This creates a concentrated brine that is reabsorbed, seasoning the meat from within. Salt also denatures proteins, leading to a more tender result.
- When to Salt: The Great Debate
- Dry Brining (Salting Well in Advance): This is the preferred method for maximum flavor and tenderness. Salt the steak at least 40 minutes (ideally, 2 hours or more) before cooking. Place it uncovered in the refrigerator. This allows the salt to fully penetrate the meat, creating a deep, even seasoning. Overnight is perfectly fine too.
- Salting Right Before Cooking: If you’re short on time, salting right before cooking is better than nothing. However, the salt won’t have as much time to penetrate, resulting in more surface seasoning.
- Salting After Cooking: This is generally not recommended. The salt will only sit on the surface, providing a less nuanced flavor.
- How Much Salt? A good rule of thumb is about ½ teaspoon of kosher salt per pound of steak. Don’t be shy! It might seem like a lot, but remember that some of the salt will fall off during cooking.
Mastering the Heat: From Rare to Well-Done (and Everything In Between)
The internal temperature of your steak is the key to achieving your desired level of doneness. Here’s a guide:
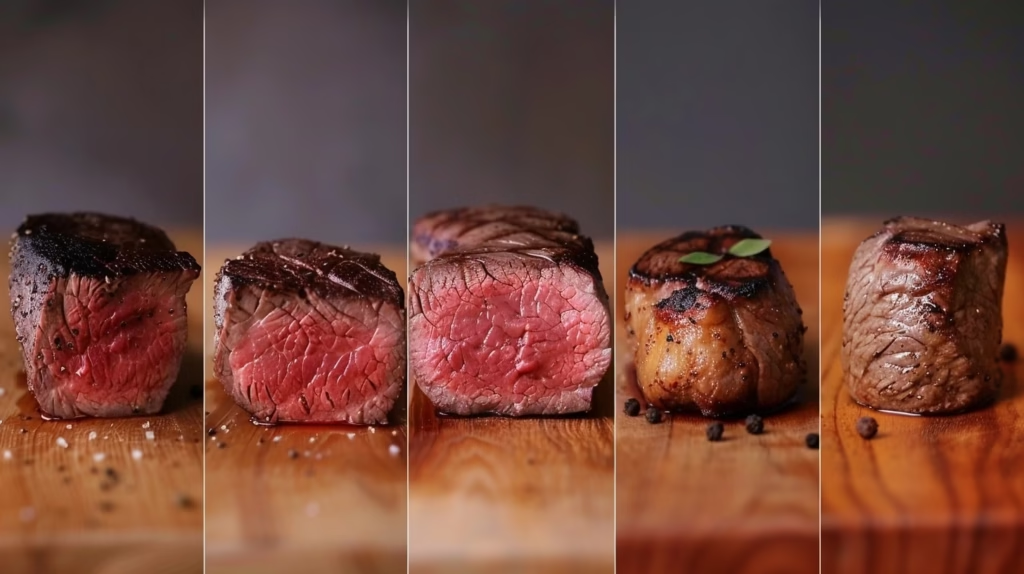
- Rare: 125-130°F (52-54°C): Cool red center.
- Medium-Rare: 130-135°F (54-57°C): Warm red center. This is widely considered the ideal doneness for most cuts.
- Medium: 135-145°F (57-63°C): Warm pink center.
- Medium-Well: 145-155°F (63-68°C): Slight pinkness remaining.
- Well-Done: 155°F+ (68°C+): No pinkness.
Important Note: These temperatures are after resting. We’ll discuss carryover cooking shortly.
Choosing Your Cooking Method: Pan-Searing Basics
While grilling and sous vide are fantastic options, pan-searing is a reliable and accessible technique for cooking steak indoors. The key to pan-searing is to have a heavy cast iron to trap heat. Here’s a basic overview:
- Pat the steak dry: Excess moisture inhibits searing.
- Heat a heavy-bottomed skillet (cast iron is ideal) over high heat. The pan should be smoking hot.
- Add a high-smoke-point oil (e.g., canola, avocado) to the pan.
- Carefully place the steak in the hot pan.
- Sear for 2-3 minutes per side, until a deep brown crust forms.
- Reduce heat to medium-low. Add butter, garlic, and herbs (optional).
- Continue cooking, flipping occasionally, until the steak reaches your desired internal temperature. Use a reliable meat thermometer to monitor doneness.
- Baste the steak with melted butter during the final minutes of cooking.
We’ll dive deeper into other cooking methods in future articles!
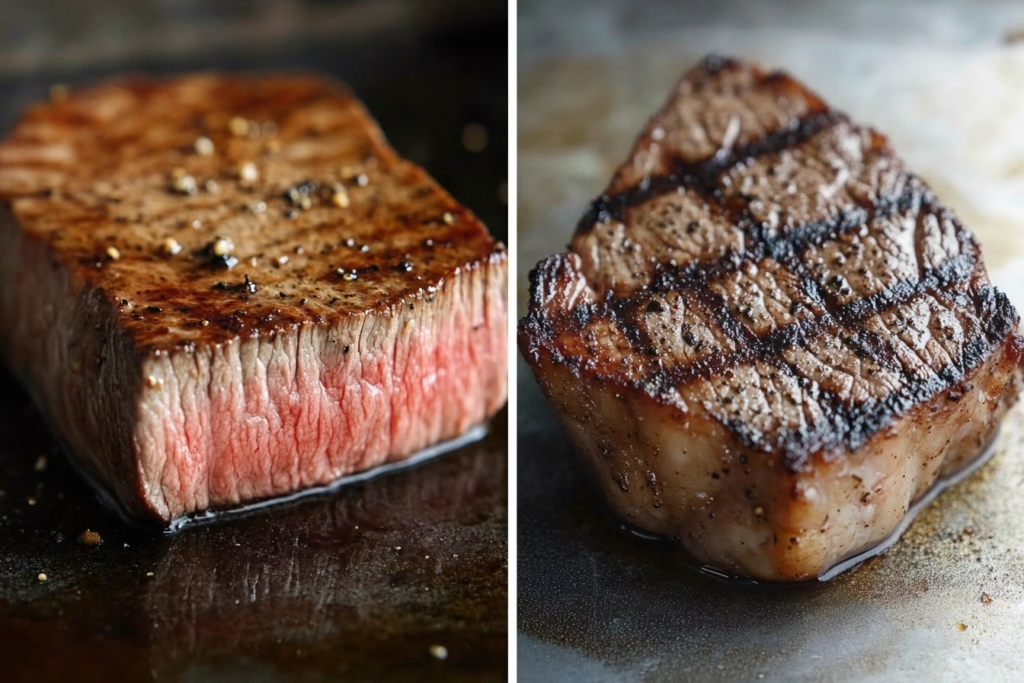
Achieving the Perfect Sear: The Maillard Reaction and High Heat
That beautiful, flavorful crust on a steak is the result of the Maillard reaction – a chemical reaction between amino acids and reducing sugars that occurs at high temperatures.

- Key Factors for a Great Sear:
- High Heat: Essential for achieving the Maillard reaction quickly.
- Dry Surface: Moisture inhibits browning.
- Fat: Helps transfer heat evenly and promotes browning.
Post-Cook Care: The Final Touches
What you do after you take the steak off the heat is just as important as what you do during cooking.
- Carryover Cooking: It Doesn’t Stop When You Stop
- The steak continues to cook even after it’s removed from the heat. This is due to the residual heat in the outer layers of the meat.
- To account for carryover cooking, remove the steak from the heat when it’s about 5-10°F below your target temperature.
- The Art of Resting: Let It Relax!
- Resting allows the muscle fibers to relax and reabsorb some of the juices that were expelled during cooking. This results in a juicier, more tender steak.
- Let the steak rest for at least 5-10 minutes before slicing.
- When Might You Skip Resting? If you accidentally overcook your steak slightly, slicing it immediately can help halt the carryover cooking process and prevent it from becoming even more overdone. The decision depends on how close it is to being fully cooked.
- Slicing Against the Grain: Maximizing Tenderness
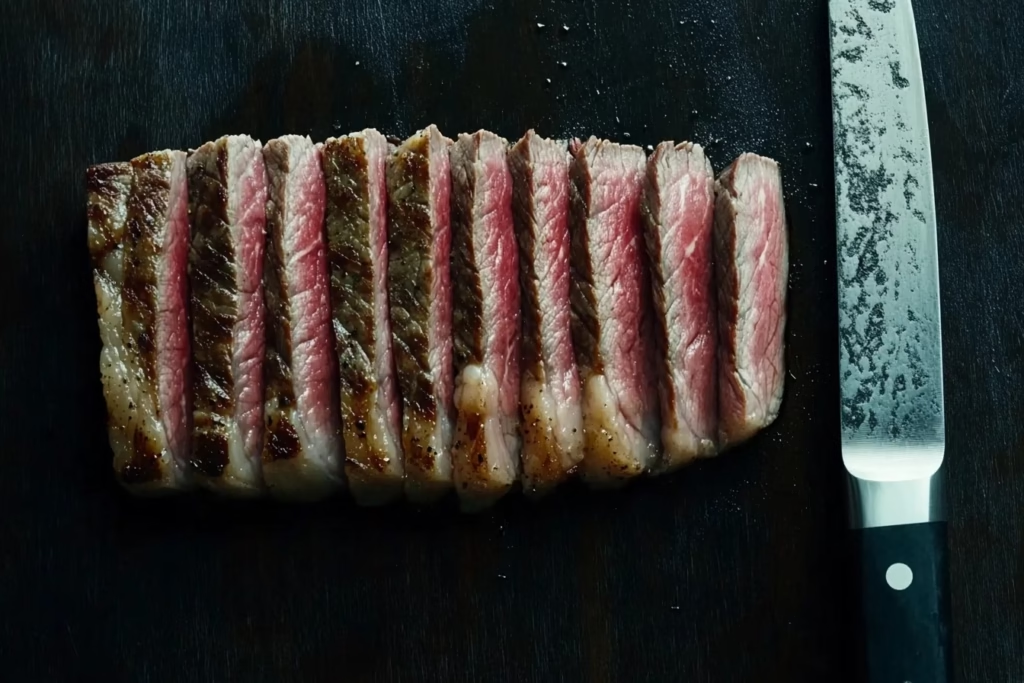
- Ensure you slice the steak against the grain. This shortens the muscle fibres making the steak easier to chew.
- Slicing with the grain will make the steak tough to chew
Common Mistakes & How to Avoid Them:
- Overcooking: Use a meat thermometer!
- Under-Seasoning: Don’t be afraid to salt generously.
- Not Using a Hot Enough Pan: A screaming hot pan is essential for searing.
- Flipping Too Often: Let the steak develop a crust before flipping.
- Cutting Into It Too Soon: Resting is crucial!
Beyond the Basics: Simple Steak Sauces & Pairings
Elevate your steak with a simple pan sauce!
- Pan Sauce
- Garlic Butter: Melt butter in the pan with garlic and herbs, then spoon over the steak.
- Side Dish Suggestions: Roasted vegetables, mashed potatoes, a simple salad.
Conclusion: Steak Mastery is Within Reach!
Cooking a perfect steak at home is achievable with the right knowledge and a little practice. By understanding the principles outlined in this guide, you can confidently select, prepare, and cook steak like a pro. Don’t be afraid to experiment and find what works best for you. Now, go forth and create some steak magic!
Ready to level up your steak game? Subscribe to our newsletter for more mouthwatering recipes, essential cooking tips, and exclusive content!